The painting featured here was done during my recent birding workshop at the Pine Butte Guest Ranch in Montana, and is being auctioned to support the great work of Kate Davis’s Raptors of the Rockies program.
The auction will run until Sunday evening, June 17th, and can be seen in the sidebar to the right.
More info about Kate Davis and Raptors of the Rockies
More info about the Nature Conservancy’s Pine Butte Guest Ranch
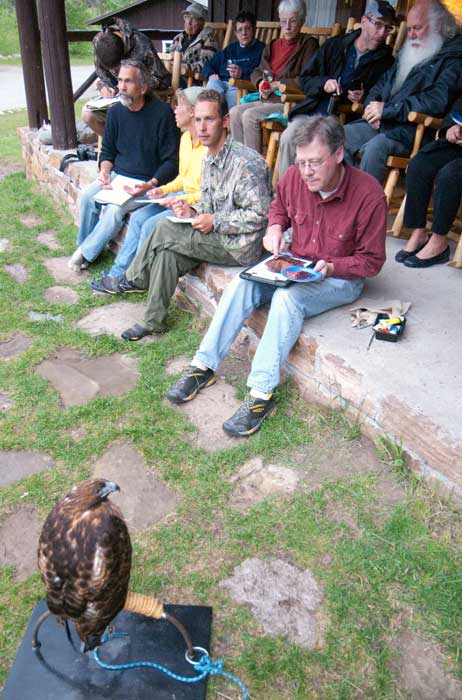
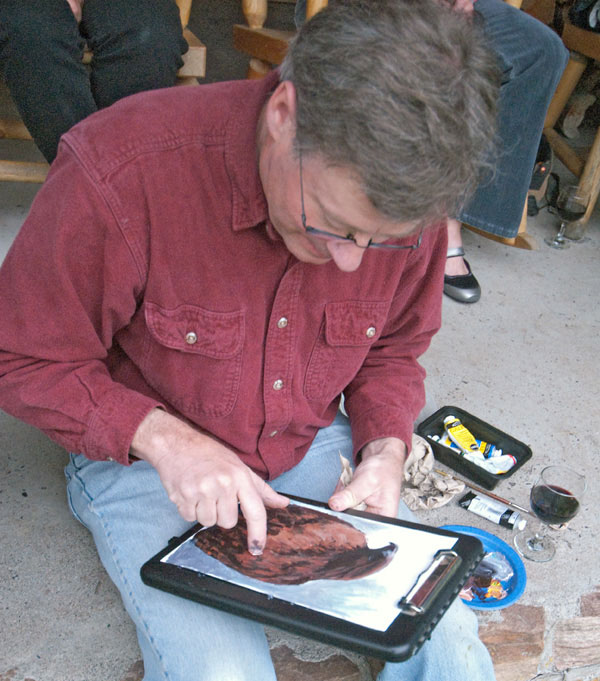
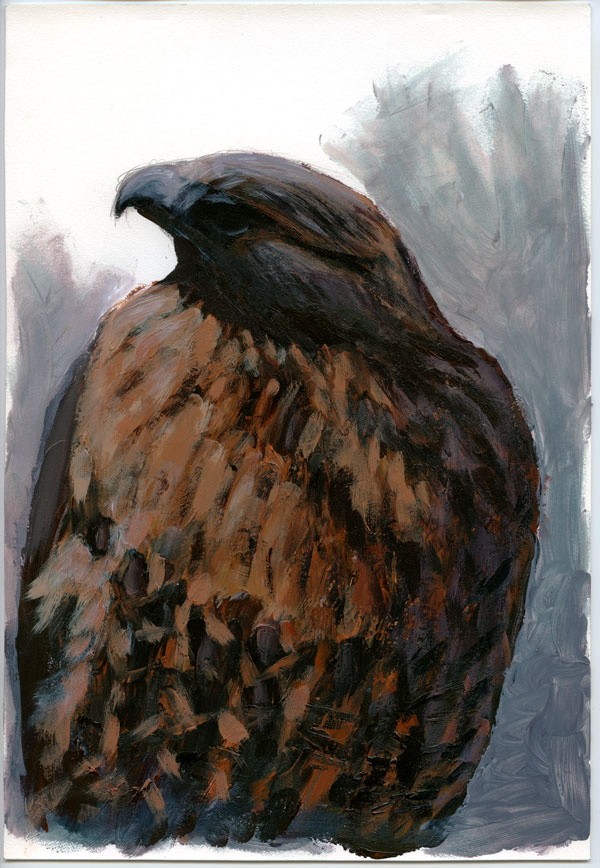
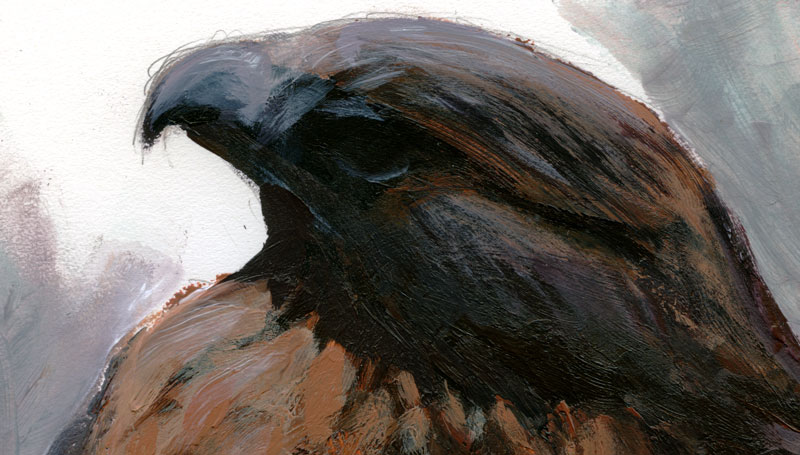
My fascination with finger-painting goes back a few years to a painting I did with my kids, and I fell in love with the simplicity of it, especially for painting in the field. Just squeeze some acrylic paint onto a disposable palette (small paper plates work well) mix with your finger and smear it on the paper. When you need to change colors just wipe your finger clean on a paper towel and continue. There’s no need for water, no rinsing of brushes; just you, the paint, and the paper.
A finger is a fairly limited means of delivering paint to paper, but I like the fact that there is no chance of getting bogged down in details in the painting. It forces me to simplify the image to broad patterns and blocks of color that I can manage with a finger. (I confess that I do use a brush to touch up some of the finer details, but very little, and I usually end up smudging it with my finger anyway).
My palette is also as simple as I can make it, and developed during the years that I worked on the Guide to Trees. I used four colors for this painting – green, red, yellow, and white. Sometimes I need to use a fifth color (blue) but not here.
I mix red and green to create a neutral black, which always varies a little from the green side to the red side. Adding white makes gray and reveals the color shift of the latest version of “black”. If I add more red and some yellow it makes a reddish brown, and I can add more yellow and white to make a lighter orange-brown. Using so few colors makes it easier to control the subtle variations, and helps to keep the whole painting unified and all of the colors related.
For me, at least, reducing the tools, the colors, and the image to the bare minimum leads to a more enjoyable painting experience.


cooooool! (except you make it look preposterously too easy… I miiiight be able to do a respectable stick-figure with my finger).
The detail looks to have taken hours. It is like an optical illusion in time. NS
Who won? NS
Congratulations to Sedra, the winning bidder in the auction, and thanks for supporting Kate’s work at Raptors of the Rockies.
That looks like a fun thing to try, and the results are pretty impressive. I’m a big fan of your bird guides for both eastern and western species and use them as my first go-to source when I’m in the field and encounter a particularly vexing bird. I thought you might be interested in a new natural history website I’ve started called New England Nature Notes (www.newenglandnaturenotes.blogspot.com) I live in MA so many of the places I write about (and photograph) will undoubtedly be familiar to you. Thanks for all of your great work, and if you’d ever be interested in doing an interview for the site, please defintiely feel free to drop me a note at newenglandhnaturenotes@gmail.com Since the site started about a month ago I have done two interviews – one with Connecticut naturalist and author John Himmelman and another with Mass Audubon Pleasant Valley WLS Director Rene Laubach.
Thanks,
Dan Levenson
Editor,
New England Nature Notes
Love the painting! The hawk looks awesome and the fact that you were able to create this by finger painting makes it even more impressive.
Hi David
We are getting older, time doesn´t stop, you have more white hair than years ago when I got the first edition of your field guide, but at least not like the guy behind (Santa?).
Best regards
That’s Howard Shapiro, one of a whole group of very accomplished people on the workshop. Howard’s TED talk – about increasing the nutritional content of African food crops – was just released here
http://blog.tedmed.com/?p=1838